Installing a Set of Tracks on Your Argo
Do you want maximum traction from your Argo XTV? Installing a set of tracks decreases your vehicle’s ground pressure and adds a traction surface designed specifically for your operating environment. This lets you cross terrain that is impossible for other vehicles, including soft mud, snow, and ice. Here’s how you can get your new tracks over the wheels of your amphibious ATV.
Installing Axle Extensions
Axle extensions are standard on most new models. If your XTV doesn’t have them, they must be added to give the tracks enough clearance from the hull. You can operate your vehicle with or without tracks once the extensions are installed.
Procedure:
1. Lift the vehicle onto blocks and remove the wheels.
2. Thread the extension studs onto the wheel studs, just like you would with lug nuts.
3. Slide the extension over the studs with the small hole facing away from the axle.
4. Install the wheels.
Assembling the Tracks
6×6 models usually need 31 ½ segments for each side, while 8×8 models need 39 ½ segments for each side. You may need to add or subtract a full or half-section to compensate for tire wear. Once installed, there should be an inch of slack on Frontier, Aurora, and Avenger models, while other models should have two-and-a-half inches of slack.
Line up the holes on two-track segments, and place a lock bushing in the gap at the center of where the segments meet. Hammer the track pin through the holes and bushing. Add a drop of blue threadlocker to the set screw and install it in the bushing. As you build your track, alternate the direction of each track pin.
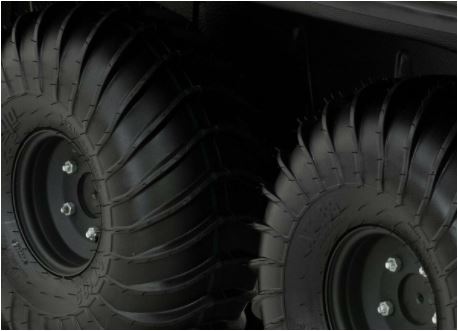
Preparing the Tires
The tracks must be installed around equal-sized tires. Otherwise, speed differences between wheels can cause chain windup, which will ultimately damage the drive system.
Remove the wheels and inflate the tires to 10 PSI. New tires and previous older tires that are under 5 PSI should sit for 24 hours to fully stretch out. After sitting for a day, recheck the tire pressure.
Measure the circumference of each tire using a tape measure. Sort the wheels so that each side has tires with ½ inch diameters within of each other.
When you install the wheels on a 6×6, put the smallest tire up front and the largest on the back. On 8×8 ATVs, install the smallest tires on the front axle. On the second axle, install the largest tires. Follow this with the second-largest tires on the third axle and the second smallest on the rear axle.
Finally, air up the tires to the following pressures, from front to back:
6×6 models
5, 5, and 6 psi
8×8 models
5, 7, 7, and 6 psi
Tread Installation

Lay the treads on the ground in front of your Argo and drive over them. Stop when there are two tread sections in front of the front wheels. Wrap the back of the tread over the tops of the tires. You may need to deflate the front and rear tires to get the tread ends to meet. Use a C-clamp to hold the ends together. Install the bushing, track pin, and locking screw to link the ends of the track.
Tread Removal
Use a C-clamp to take the tension off of two tread sections. Remove the set screw, then use a hammer and punch to remove the set pin. Unroll the treads and drive off them.
Need Parts? Don’t Want to Install Tracks Yourself? We Can Help.
Shank’s Argo is one of the largest dealers in the Eastern U.S, so we don’t just stock parts, we also have a service department that can handle repairs and upgrades for your vehicle. Visit us at 4900 Molly Pitcher Highway in Chambersburg, PA, or order treads and extensions at www.shanksargo.com. We can ship what you need to any address in the U.S. or Canada. Looking to buy a new amphibious ATV? Visit our showroom, or see the vehicles we have in stock on our website.